
Done using GIMP 2.10.24 on Kubuntu Linux 20.04 LTS
LCh is yet another color model, and in this case it breaks down the components into Lightness, Chroma, and hue. It is based on how people perceive differences in color. Technically, it is a polar transform of the LAB color space, where L stands for Lightness, and a and b are opposing color pairs. A is the pair of red/green, and b is the pair blue/yellow. This model is a perceptual model based on how the human eye works to perceive colors. The idea is that the human brain processes color information from the cones and rods of the eye in an antagonistic manner. So the “a” can be thought of as a spectrum running from red to green, and “b” similarly running from blue to yellow. While the axes for these are unbounded in theory, as a practical matter it is normal to confine the values to a range of -128 to +127. LCh takes this model and turns it into polar coordinates to map onto a cylinder. This is the last of the color models we will look at in this series, but if you want to investigate this further, you can start with this Wikipedia article. But the basic idea is that color models can focus on being fairly practical for reproducing color (RGB, CMYK), or they can focus more on how humans perceive color (HSV, LCh).
What we want to do in this tutorial is look at how LCh can be used to blend layers in GIMP 2.10.
LCh Hue
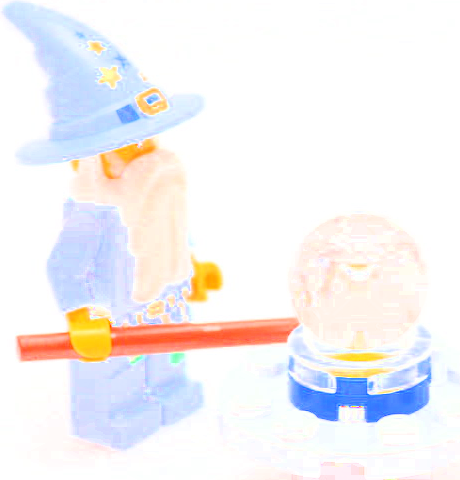
This Layer Mode keeps the hue of the top layer while taking the Lightness and Chroma of the bottom layer. This makes it very similar to HSV Hue, therefore. But there is a subtle difference because of how the colors are modeled. So I made a color layer as I did with the HSV Hue, and filled it with the same color (857369). I made the color layer the top layer, and the toy the bottom layer, and got this:

To compare, here is what I got with HSV Hue:

While these are very similar, a close look shows that they are slightly different. This is most noticeable when you look at the hands of the wizard. They are a darker orange in the HSV Hue image. But in fact everything looks just slightly darker in the HSV Hue image.
LCh Chroma
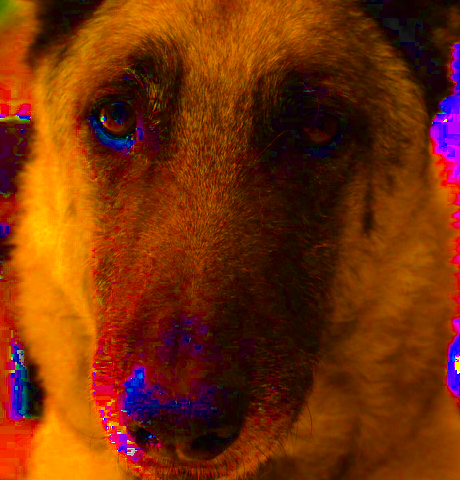
This again is similar to its HSV counterpart, which in this case would be HSV Saturation. The LCh Chroma takes the Chroma information from the top layer and combines it with the Lightness and hue from the bottom layer. I repeated what I did in the HSV Saturation images to get this for the Dog image combined with a pure green layer (00ff00).

Again, primary colors that were not noticeable in the original, such as the blue in the dog’s nose and under the dog’s eyes have been brought out here. But you can see a difference. Here is the HSV Saturation version for comparison:
The HSV Saturation image is clearly a lot darker.
Then I did the toy image:

And again for comparison, the HSV Saturation image:

Again, the HSV Saturation image is a lot darker. And the LCh Chroma has picked up a lot more yellow.
LCh Color
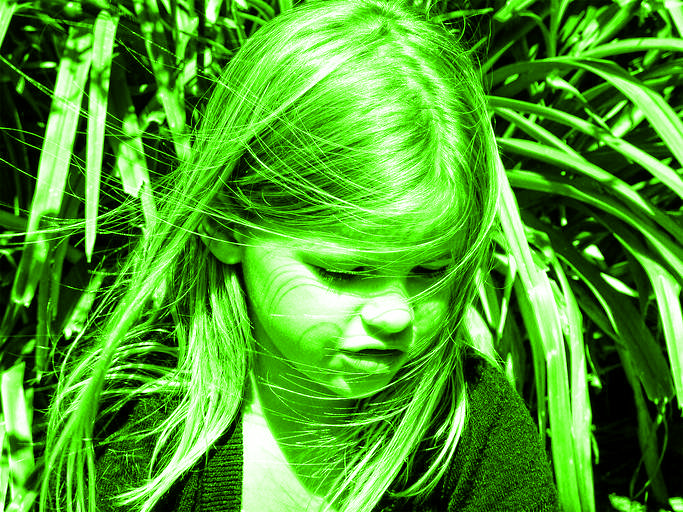
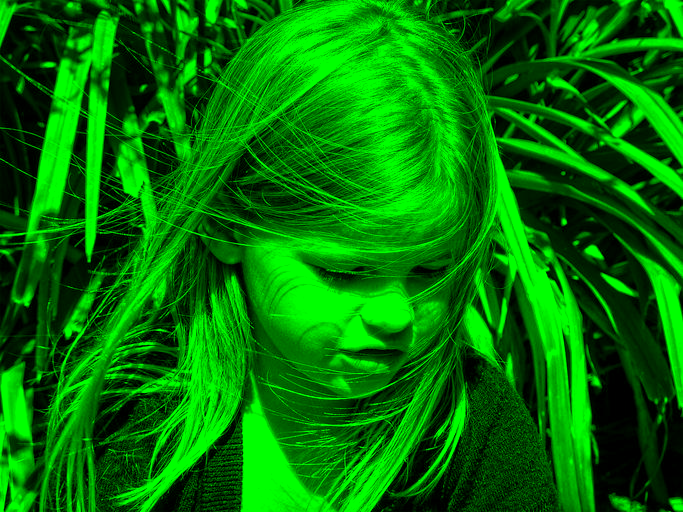
This is a counterpart to the HSL Color in the HSV section. And that means it shows up best when colorizing a black-and-white image. So I went back to the photo of the little girl and repeated the process here:

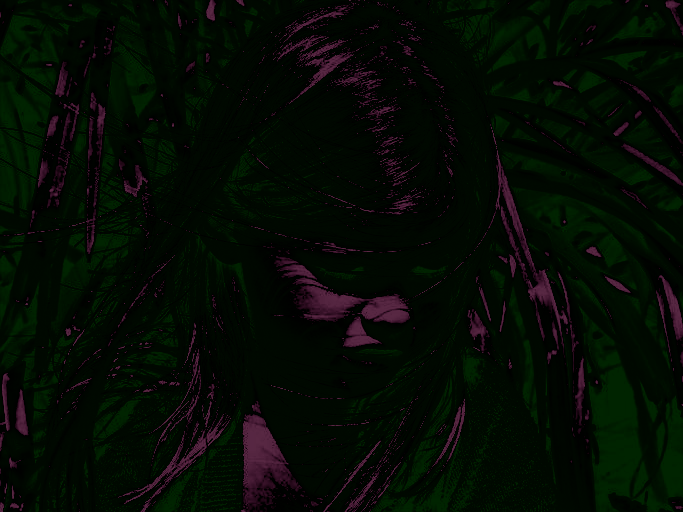
And again for comparison, the HSL Color version:
Now in this case the LCh Color version is slightly darker. So the point is not that LCh is always lighter, but it is generally slightly different.
LCh Lightness
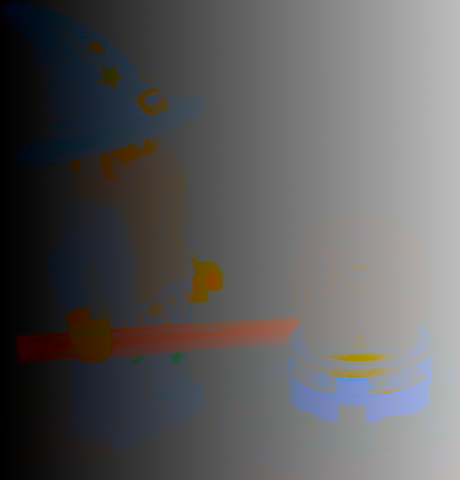
This mode takes the lightness of the top layer and combines it with the Chroma and hue of the bottom layer, and is analogous to the HSV Value mode. So I repeated my steps by first creating a linear gray-scale gradient with Black as my foreground color and White as my back ground color. I then used this as the Top layer to get this image of the Dog:

In comparison, here is the HSV Value image:

The LCh Lightness image is more washed out and has lost a lot of the detail that the HSV Value preserved. Doing the same for the Toy image I got:
And the HSV Value version:

Again, we see that the LCh Lightness version is more washed out and has lost a lot of information.
Finally, I again did this with a pure white layer:

And again, the HSV version:
And again, not surprisingly, the LCh Lightness version is more washed out and has lost more information.
Luminance
Luminance is similar to Lightness, but the difference is that is how the lightness is perceived. To quote Wikipedia:
Luminance is often used to characterize emission or reflection from flat, diffuse surfaces. Luminance levels indicate how much luminous power could be detected by the human eye looking at a particular surface from a particular angle of view. Luminance is thus an indicator of how bright the surface will appear. In this case, the solid angle of interest is the solid angle subtended by the eye’s pupil.
https://en.wikipedia.org/wiki/Luminance
When used a layer mode, the effect is the opposite of the LCh color mode, and only slightly different from the LCh Lightness mode, the difference being in that the Luminance is how the human eye perceives it, whereas Lightness is how it is measured by instruments.
If you recall from our previous discussion of the HSL Color mode, that takes the Hue and Saturation from the top layer and mixes it with the Lightness of the bottom layer. And in the LCh Color it takes the Chroma and hue of the top layer and mixes it with lightness of the bottom layer. And we used them in colorizing black-and-white photos because the only information in a black-and-white photo is how light or dark each pixel is. So those modes take the information of the black-and-white photo and combine it the color information we put in from the top layer.
In the Luminance mode, as in the Lightness mode, this is reversed. So if we put the black-and-white photo on top and use the Lightness mode, would we get the same result? (Remember, the LCh Color used Lightness, not Luminance.)

Well it certainly looks the same to me. But to be sure, I used both images with the Difference mode and got a pure black image, so they are in fact completely identical. So how does Luminance affect it?
The difference is very subtle, but in GIMP I could switch back and forth and I saw clearly that the Luminance image was just slightly darker. And to prove they are different, here is what I get using the Difference mode between the two images:
Summary
This concludes our look at all of the Layer Modes in GIMP. We have looked at a lot of information regarding Layers because they are so central to how GIMP operates. We could perhaps spend more time digging into all of the other tools, but I don’t want to do that right now. My primary objective when I started was to work on photos. So I think I will move in that direction, and explore other tools as they come up. But first, I am going to cover RAW images and how they can be worked with.
 Save as PDF
